Invoices Billable
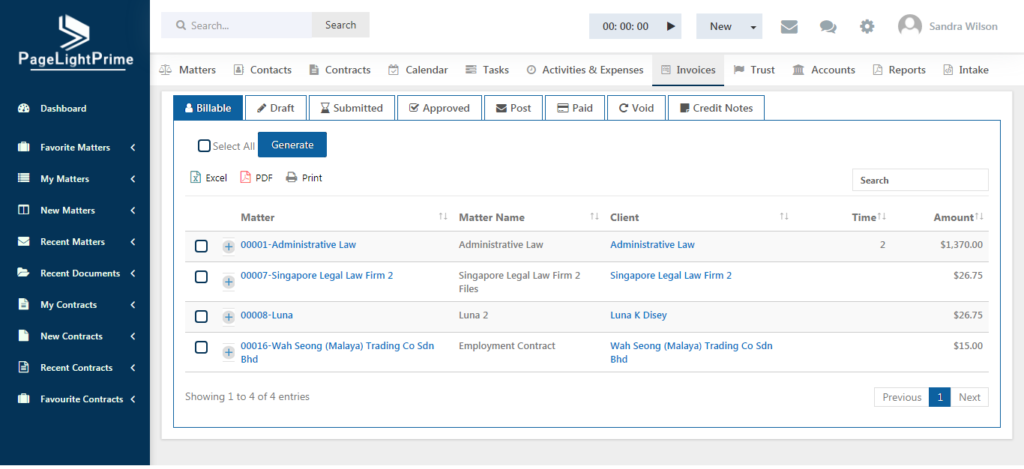
The various activities and expenses are present in the Billable Section. This section lets users to prepare invoices.
Select a matter for which invoice has to be generated.
Click the checkbox of the desired matter and click ‘Generate’ button.
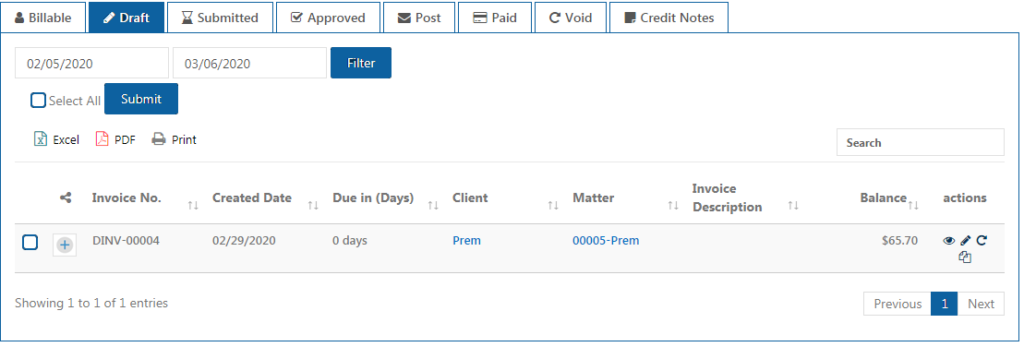
The selected matter enters the draft stage and the below page appears.
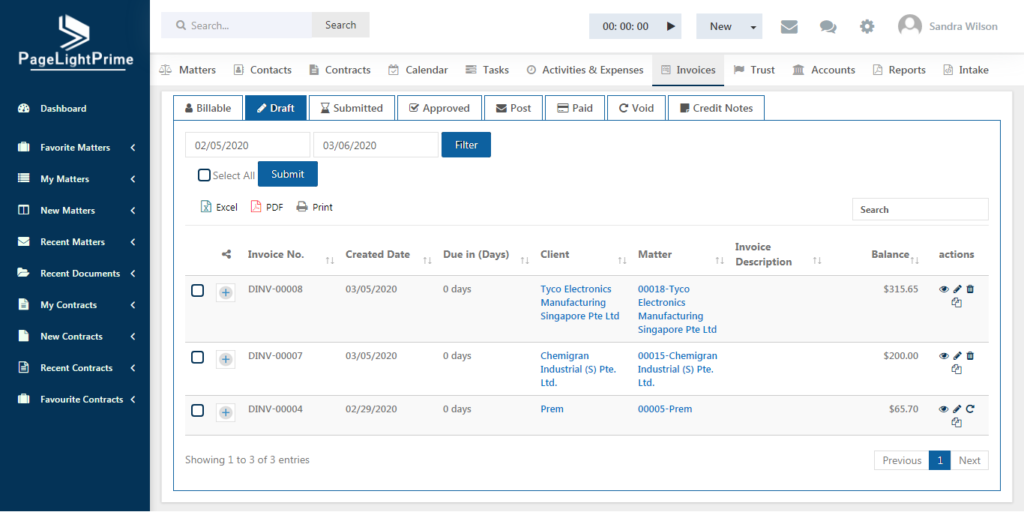
Note that the Invoice number changes when the Matter enters the draft stage and in the Actions column, the below features are available.

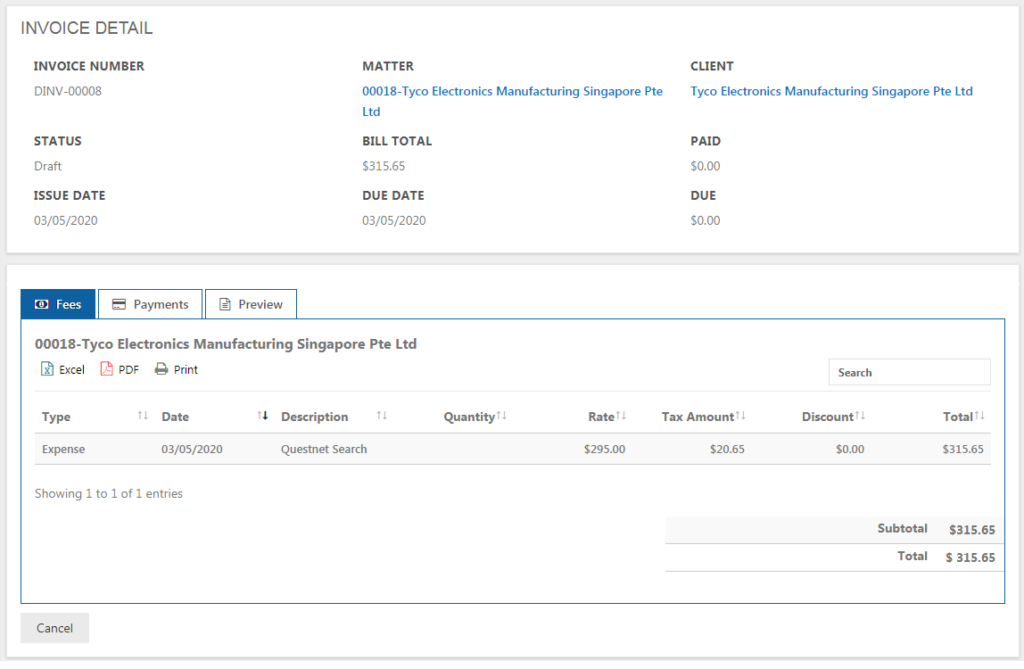
The invoice can be viewed using the ‘eye’ button..
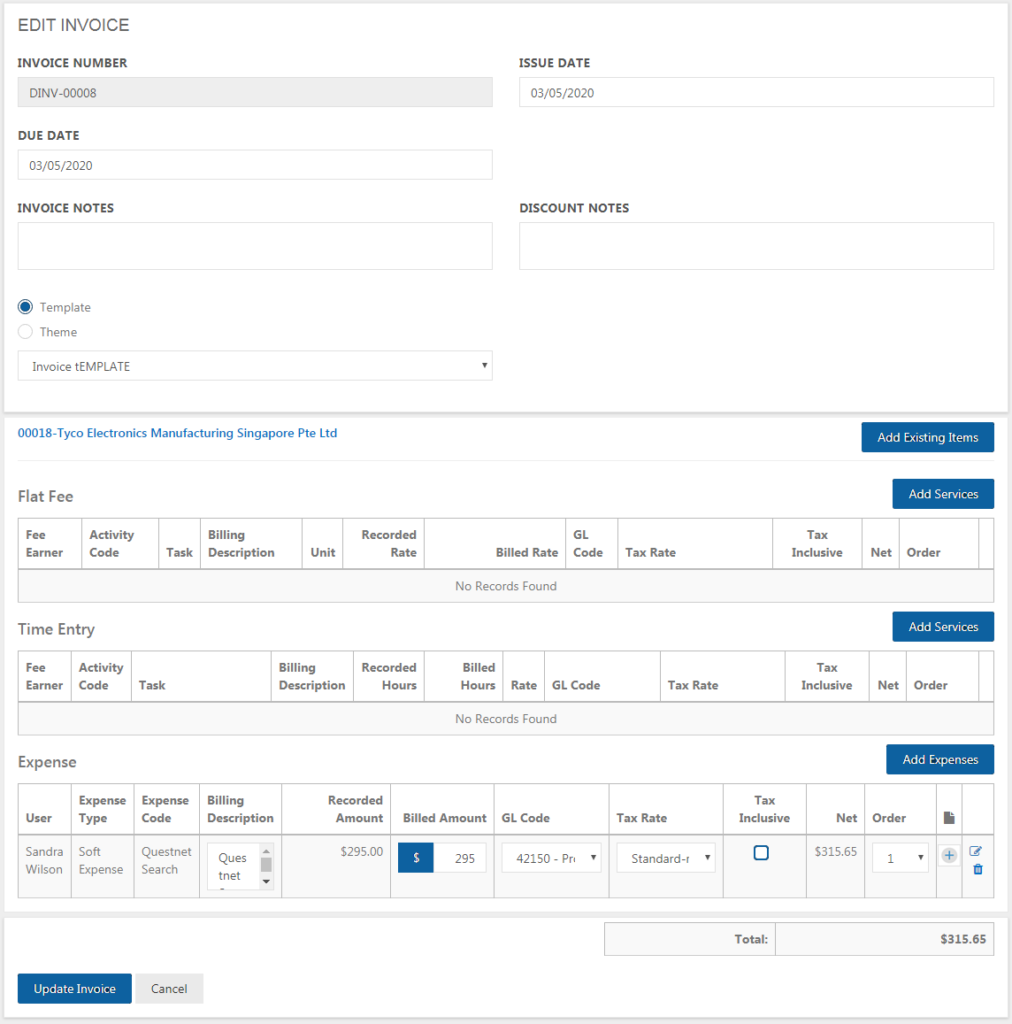
Invoice can be edited using the pencil icon.
Invoices can be deleted or copied to other Matter/ Quotation / Clients also to reuse and edit the existing invoices.
The invoice numbers are calculated automatically based on the Invoice Settings. When the invoice changes phase from Draft/ Submit Stage and to Approved stages, the invoice numbers are changed for each stage for easy reference.
If a matter has more time entries and expenses, select particular time entries for which invoice has to be calculated. .
In the draft stage, click the checkbox of the Matter/Client and click ‘Submit’.
The Matter then enters the Approved stage. The entries in red indicate that there are no approvers and hence auto approved.
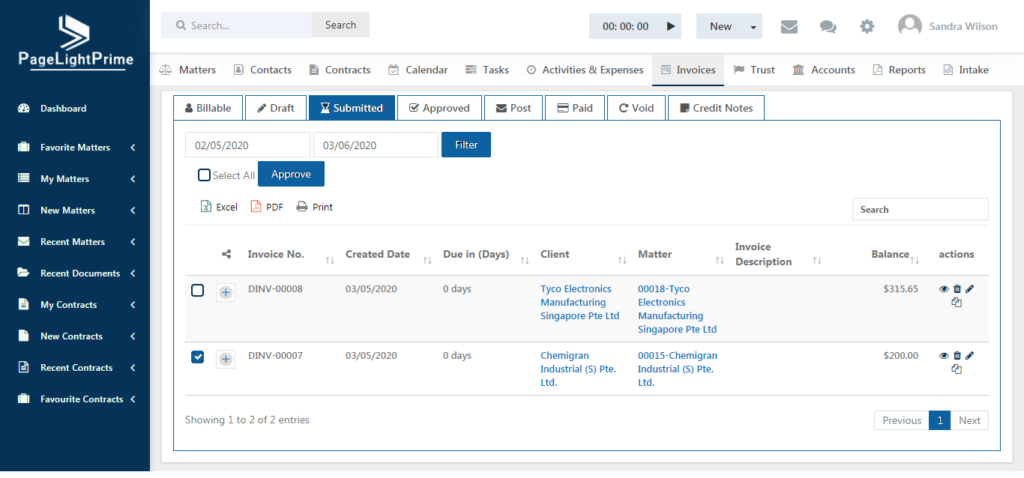
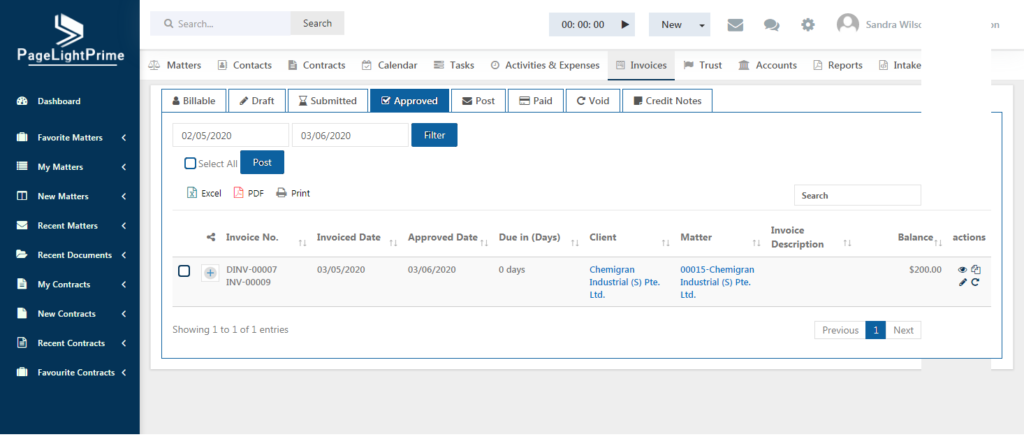
For other entries, click on the check box and click ‘Approve’. The Matter then enters the approved stage.
The invoice can be downloaded through the below procedure.
1.Click on the eye button of the Matter.

2.The below page appears. Click on the ‘Preview’ button to view it.
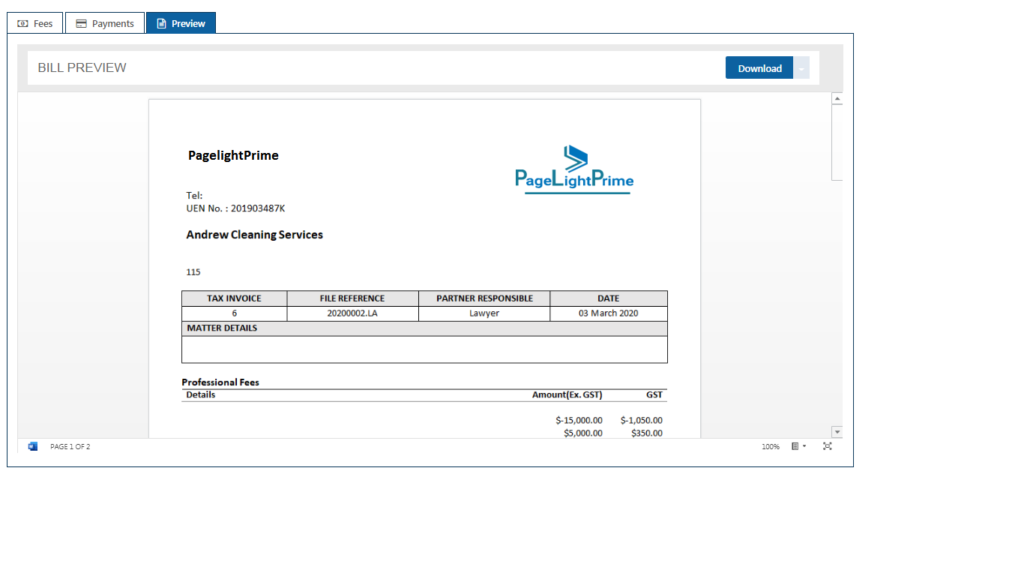
3.The ‘Download’ option is available on the right.
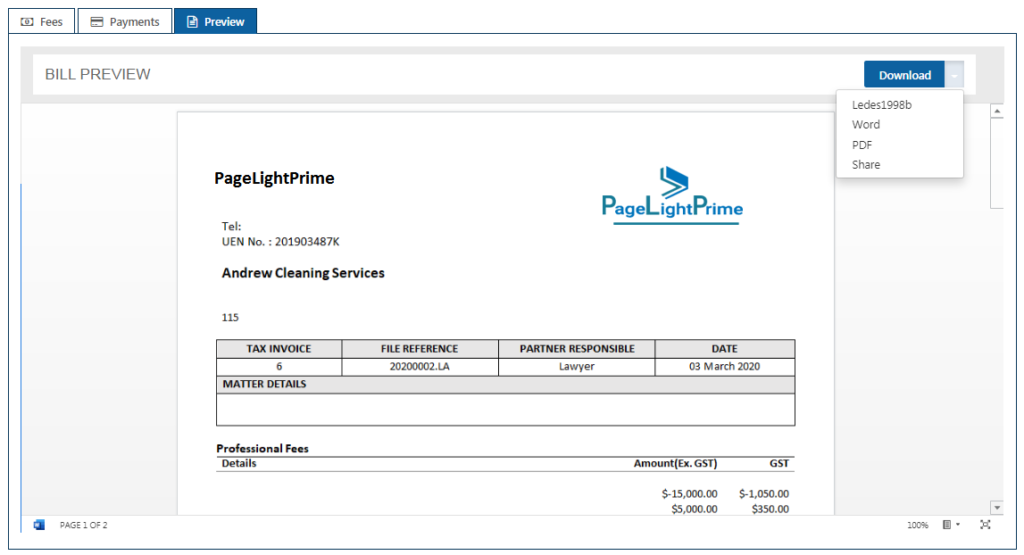
The invoice can be downloaded or Word or pdf or can be printed instantly. The invoice can also be shared using the ‘Share’ option under download. The below page appears.
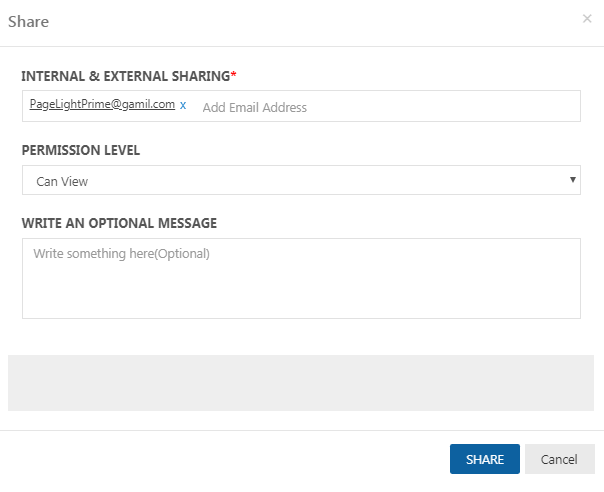
Enter the email Id and set the permission level and click on ‘Share’ button to share the invoice.
Invoices – Post, Paid, Void and Credit Notes
After the invoice is approved, it enters the post stage.
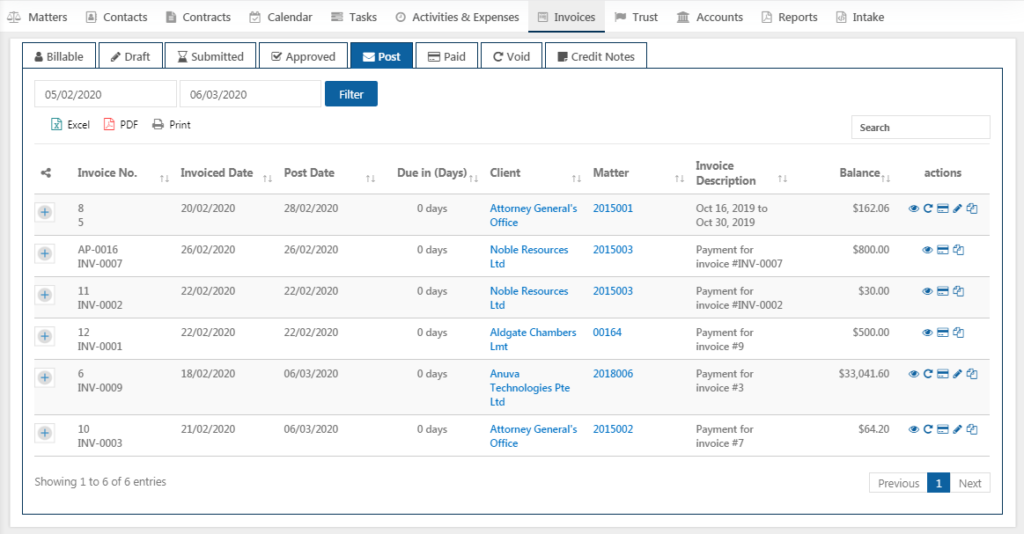
Invoices in Post Stage are ready for payment. Note that payment can be made only by Finance people.
To make a payment, click on the record payment button – which is the second button in the Actions tab. The below page appears.
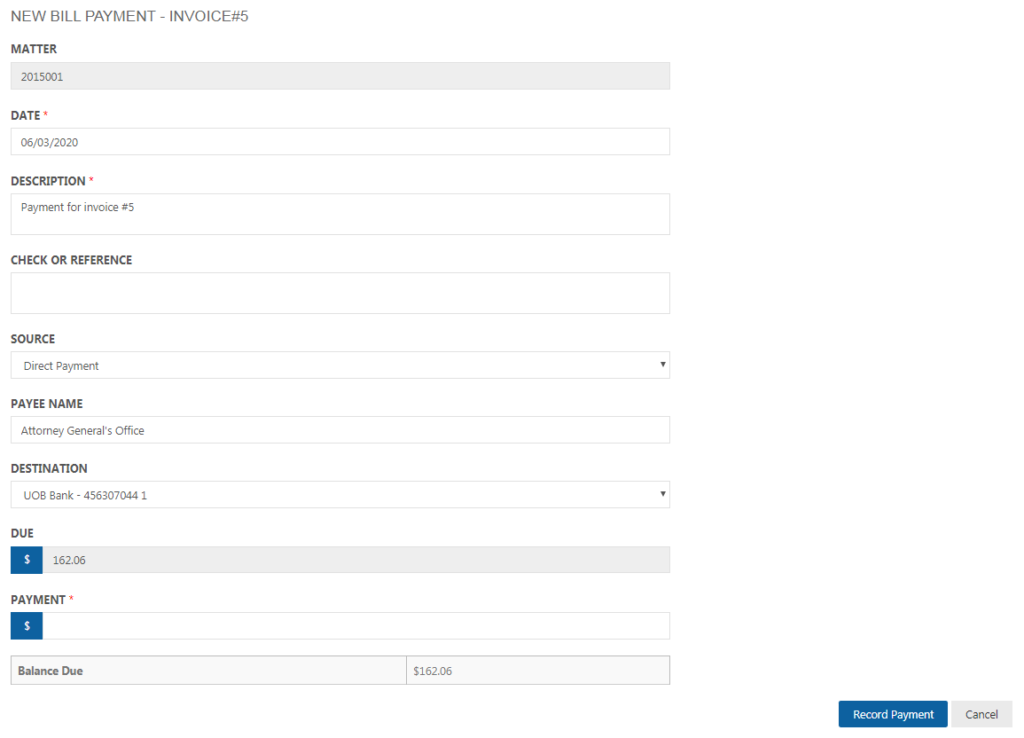
Select the source and destination accounts. The destination account will always be an operating account or an office account. The due amount of payment is showed in the payment page. In the payment tab, enter the amount to transfer. The remaining amount is calculated and showed as Balance Due.
Then click on the ‘Record Payment’ button. The payment receipt is generated.
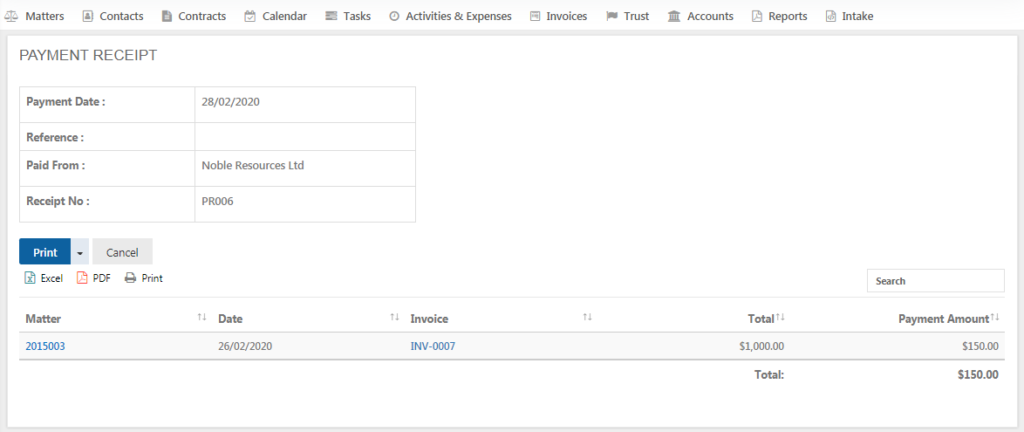
Once payment is made partially, edit/delete action is not permitted.
In the ‘PAID’ Tab, fully paid invoices are maintained.

In ‘VOID’ Tab, any cancelled/ rejected payments are found.

The last tab of Invoices is ‘Credit Notes’. Credit notes are particularly useful to give credit or make payment for any expense or invoice and to have it as an evidence or record for tracking the account.
